- Clean Home
- Home Maintenance
- Easy Bathroom Caulking Tips
Easy Bathroom Caulking Tips
Here are easy bathroom caulking tips to repair the dingy, cracked, or mildewed bathtub yourself. Without this quick fix, even a sparkling clean bathroom can look dirty and unappealing.
If you've resisted replacing the bathroom caulking because it seemed like a big job, hesitate no more. You can make this simple repair, which packs a big decorative punch, with minimal effort and only a minimal amount of experience.
These easy bathroom caulking tips can help.
Common Bathroom Caulking Mistakes
One common mistake people make when they notice that the caulking around a tub or shower stall has become stained or mildewed (or that some have fallen out) is simply spreading a fresh layer of caulk over the dingy or crumbling area.
It does brighten the bathroom—for a week or two. Then, the underlying mildew eats its way up through the new layer of caulk, treating the recent arrival like a little snack.
Before long, you find that you (and your bathroom) are back to dingy and crumbling square one. Here's how to recaulk the right way, step-by-step.
Easy Bathroom Caulking Tips to Remove Old Caulk
Remove all old caulking material around the tub using a stiff putty knife and a small, inexpensive razor scraper.
Dig out as much old caulk as possible to form a shallow groove along the entire edge between the bathtub and the tile or the tub or shower surround.
Next, thoroughly scrub the area with a bleach-based cleaner and a stiff brush. Rinse well and allow to dry completely. A fan temporarily directed at the location will speed up the drying process.
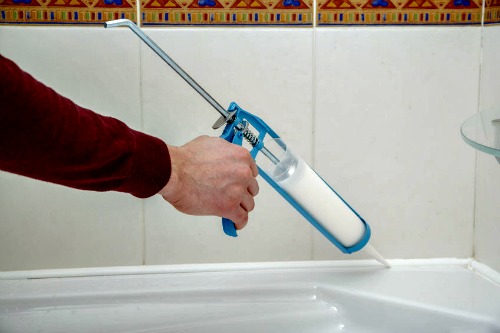
Fill the shallow groove with a thin, continuous bead of caulk using a latex-based tub-and-tile caulk in either a squeeze tube or a caulking gun.
While the line of caulk is still fresh and before the skin starts to set and harden—within a few minutes, at most—moisten your fingertip and use it to smooth the caulk out and push it thoroughly into any gaps.
Then, carefully wipe any excess material with a damp cloth. The trick is using the least caulk necessary to fill the tiny gap between two materials and surfaces.
When completed, it should be nearly invisible and not protrude any farther than the tile or the edge of the tub or shower. Otherwise, it can act as a trap for moisture and allow mildew to grow.
Let the new bathroom caulking set for as long as the package directions indicate (usually overnight).
Finally, you can avoid ever having to do this again by regularly drying tub surfaces, shower walls, fixtures, and caulked areas with a clean towel.
If stains appear, try cleaning the caulking with a mildew-killer or another commercially available grout cleaner.
- Clean Home
- Home Maintenance
- Easy Bathroom Caulking Tips


